Fix Epoxy Flooring Problems: Professional Troubleshooting Methods
Understanding Epoxy Flooring Challenges
Epoxy flooring has become a go-to solution for Rock Hill homeowners seeking durable, attractive surfaces for their garages and workshops. This popular coating system offers excellent protection against chemicals, impacts, and daily wear. Yet even the most experienced contractors encounter obstacles during installation and maintenance.
Property owners across South Carolina discover that epoxy floor problems can arise unexpectedly. These issues range from simple surface imperfections to complete coating failure. The good news? Most epoxy flooring problems have identifiable causes and practical solutions.
Professional installers with many years of experience understand that prevention beats correction every time. Smart property owners learn to spot warning signs early, saving time and money on repairs. This guide addresses the most common challenges facing Rock Hill residents and provides clear solutions for each problem.
Table of Contents

Problem 1: Epoxy Floor Peeling – The Most Frustrating Issue
Peeling represents the nightmare scenario for any epoxy installation. This problem typically appears weeks or months after application, starting as small bubbles before spreading across entire sections. Understanding why epoxy floors peel helps prevent this costly disaster.
Missing Primer Creates Weak Bonds
Skipping the primer step ranks among the most common mistakes in epoxy application. Concrete surfaces appear smooth to the naked eye, but microscopic pores and irregularities exist throughout the substrate. Without proper priming, the epoxy cannot form strong chemical bonds with the underlying material.
Concrete substrates require specialized primers designed for porous materials. These products penetrate deep into the surface, creating anchor points for the topcoat. Professional applicators always seal concrete surfaces before applying the main epoxy system.
Humidity Attacks Epoxy Adhesion
Moisture presents a constant threat to epoxy floor installations throughout Rock Hill’s humid climate. High humidity levels during application can cause poor adhesion and eventual peeling. Water vapor trapped beneath the coating expands and contracts with temperature changes, gradually weakening the bond.
Smart contractors monitor weather conditions carefully before starting any epoxy project. Installing moisture barriers and using dehumidifiers during application helps maintain ideal conditions. Temperature and humidity meters should guide every installation decision.
Contaminants Sabotage Surface Preparation
Oil stains, grease spots, and chemical residues create barriers between epoxy and concrete. These contaminants prevent proper adhesion even when primers are used correctly. Thorough cleaning becomes absolutely critical for long-lasting results.
Professional cleaning requires industrial-grade degreasers and specialized scrub brushes. Simple mopping cannot remove embedded contaminants that have soaked into concrete pores. Multiple cleaning cycles followed by complete rinsing eliminate hidden obstacles to adhesion.
Surface Preparation Shortcuts Lead to Failure
Proper surface preparation involves more than basic cleaning. Concrete surfaces need mechanical abrasion through grinding or sanding to create the right profile for epoxy adhesion. Smooth surfaces lack the texture needed for strong bonds.
Diamond grinding equipment removes surface laitance and opens concrete pores for better penetration. This process also reveals any underlying defects that need repair before coating application. Skipping this step virtually guarantees future problems.
Poor Substrate Quality Demands Extra Attention
Weak or damaged concrete cannot support epoxy coatings regardless of proper preparation. Crumbling surfaces, extensive cracking, or severely weathered concrete requires additional treatment before coating application.
Multiple primer coats can strengthen marginal substrates, but severely damaged concrete may need complete replacement. Professional assessment identifies substrates unsuitable for epoxy coating before work begins.
Wrong Mixing Ratios Cause Chemical Problems
Epoxy systems rely on precise chemical reactions between resin and hardener components. Incorrect proportions prevent proper curing and create weak, poorly bonded coatings. These installations often fail within months of completion.
Careful measurement and thorough mixing create the chemical bonds necessary for durable coatings. Digital scales provide accurate measurements, while mechanical mixers ensure complete blending of components.
Contamination During Application
Dust, dirt, and debris settling on wet epoxy create weak spots that eventually lead to peeling. Controlling the work environment during application prevents these contaminants from compromising the installation.
Professional contractors seal work areas and use air filtration systems during application. Clean application tools and contamination-free mixing areas maintain coating quality throughout the installation process.
Problem 2: Achieving Smooth Epoxy Surfaces
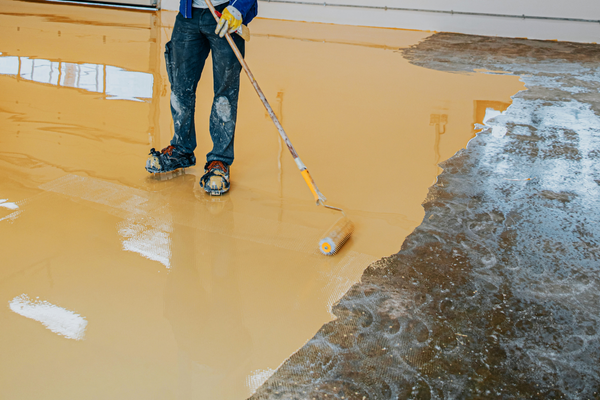
Rough, uneven epoxy surfaces disappoint property owners expecting glass-like finishes. Several factors contribute to texture problems, but most have straightforward solutions when identified early.
Product Coverage Affects Surface Quality
Using too little epoxy creates thin spots that cannot self-level properly. These areas remain rough and uneven, creating visible texture variations across the floor surface. Proper coverage rates ensure adequate material for smooth leveling.
Conversely, applying too much product can create equally problematic results. Excess material cures unevenly, forming bumps and ridges that require extensive sanding to correct. Following manufacturer specifications prevents both problems.
Mixing Quality Impacts Final Results
Incomplete mixing leaves unmixed portions throughout the coating, creating irregular curing patterns. These areas set at different rates, producing visible texture differences and surface irregularities.
Professional mixers incorporate all resin and hardener components completely. Paddle placement and mixing speed affect blend quality, requiring specific techniques for different product types.
Application Tools Matter
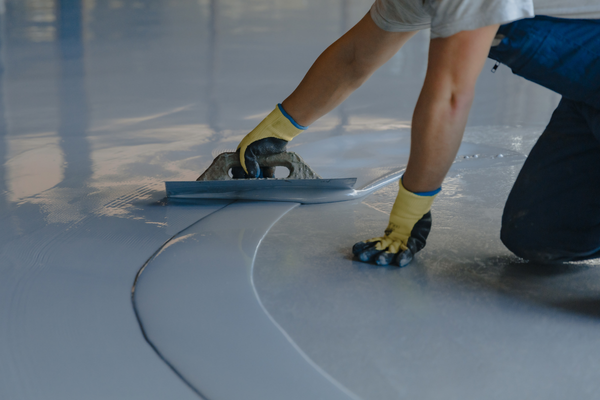
Worn or inappropriate application tools create surface defects that become permanent after curing. Old rollers leave lint and debris, while damaged squeegees create streaks and ridges in the coating.
Fresh, high-quality tools designed for epoxy application produce smooth, even surfaces. Professional applicators replace tools regularly and match tool types to specific products and surface conditions.
Temperature Controls Flow Properties
Cold temperatures thicken epoxy products, making smooth application difficult or impossible. The coating cannot flow and self-level properly, creating permanent texture problems.
Adding approved solvents helps thin cold epoxy for better flow characteristics. Temperature control throughout the installation process maintains ideal working properties for smooth results.
Problem 3: Eliminating Roller Marks, Pinholes, and Air Bubbles
Surface defects like roller marks and air bubbles create unprofessional appearances that frustrate property owners. These problems have identifiable causes and proven prevention methods.
Mixing Techniques Prevent Air Incorporation
Aggressive mixing incorporates air bubbles into epoxy systems, creating surface defects after application. Proper mixer paddle position and controlled mixing speeds minimize air incorporation while achieving complete blending.
Mixer paddles should remain completely submerged during blending to prevent air entrainment. Slow, steady mixing produces better results than high-speed techniques that create foam and bubbles.
Primer Coverage Prevents Air Migration
Inadequate primer coverage allows air trapped in concrete pores to migrate upward through the epoxy system. This trapped air creates pinholes and bubbles that mar the finished surface.
Proper primer application seals concrete pores and prevents air migration. Multiple thin primer coats provide better coverage than single thick applications that may miss small areas.
Moisture Creates Multiple Problems
Water vapor trapped beneath epoxy coatings expands during curing, creating bubbles and surface defects. New concrete contains significant moisture that needs time to escape before coating application.
Allowing adequate drying time prevents moisture-related defects. Sealing concrete surfaces properly prevents water vapor from migrating through the substrate after installation.
Environmental Conditions Affect Curing
Extreme temperature and humidity conditions create curing problems that manifest as surface defects. Too-rapid curing prevents proper flow and leveling, while slow curing allows contaminants to settle on the surface.
Maintaining consistent environmental conditions throughout the installation produces the best results. Professional contractors monitor and control temperature and humidity during application and initial curing.
Application Technique Prevents Marks
Even spreading techniques prevent visible roller marks and application patterns. Thin, uniform coats applied with proper tools create smooth, defect-free surfaces.
Professional applicators use systematic patterns and maintain wet edges to prevent visible overlaps. Avoiding surface flooding while maintaining adequate coverage requires skill and experience.
Problem 4: Why Isn’t My Epoxy Drying Properly?
Improper curing creates serious problems that extend far beyond appearance issues. Understanding how to tell if epoxy is bad helps property owners identify problems before they become costly disasters.
Hardener Ratios Affect Curing
Too little hardener creates soft, sticky surfaces that never fully cure. These installations remain vulnerable to damage and may require complete removal and replacement. Chemical balance is crucial for proper curing.
Soft, spongy floors indicate insufficient hardener or improper mixing. These conditions often lead to secondary problems including delamination and cracking as the floor experiences normal use.
Mixing Quality Determines Success
Inadequate mixing prevents proper chemical bonding between epoxy components. Even correct ratios cannot create strong coatings without thorough blending of all materials.
Electric mixers provide superior blending compared to manual mixing methods. Complete integration of resin and hardener components creates the chemical bonds necessary for proper curing.
Temperature Controls Curing Speed
Ideal curing temperatures range between 24-29°C (75-84°F) for most epoxy systems. Temperatures outside this range create curing problems that affect both appearance and performance.
Cold temperatures slow curing dramatically, while excessive heat accelerates the process beyond ideal rates. Both conditions can prevent proper chemical cross-linking and create weak coatings.

Problem 5: Preventing Surface Bumps in Epoxy
Bumps and ridges in cured epoxy surfaces create tripping hazards and collect dirt and debris. These defects typically result from air bubbles or application problems during installation.
Air Bubble Management
Excessive air incorporation during mixing creates bubbles that rise to the surface during curing. When these bubbles burst, they leave small ridges and bumps that become permanent surface defects.
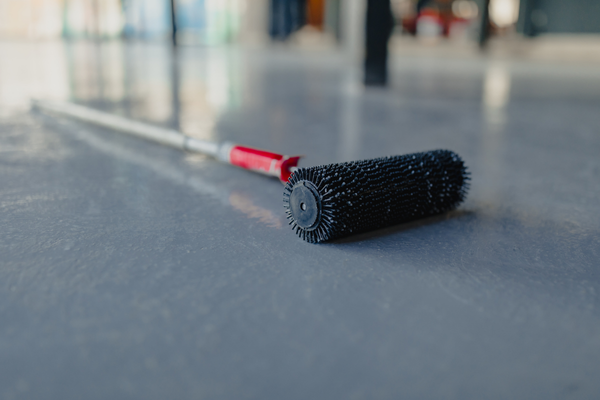
Proper mixing techniques and defoaming additives reduce air incorporation. Some installers use specialized rollers designed to release trapped air during application.
Substrate Preparation Affects Surface Quality
Poor cleaning and preparation leave defects in the substrate that transfer to the epoxy surface. Base irregularities become magnified in the finished coating, creating visible imperfections.
Thorough substrate preparation includes repairing all defects before coating application. Professional contractors identify and correct these issues during the preparation phase.
Application Technique Prevents Defects
Uneven spreading and incorrect product quantities create bumps and ridges in cured coatings. Professional application techniques maintain consistent coverage and prevent these problems.
Systematic application patterns and proper tool selection produce smooth, even surfaces free from defects. Training and experience make the difference between amateur and professional results.
Problem 6: Restoring Dull Flooring Appearance
Dull, cloudy epoxy surfaces disappoint property owners expecting high-gloss finishes. This problem typically results from moisture-related issues during curing.
Amine Blush Causes Cloudiness
High humidity during curing creates amine blush, a cloudy film that dulls the epoxy surface. This chemical reaction occurs when moisture from air, materials, or substrate interferes with proper curing.
The bluish-white film associated with amine blush can sometimes be removed through careful cleaning, but prevention provides better results. Maintaining low humidity and proper dew point margins prevents this problem.
Environmental Control Prevents Problems
Temperature and humidity control during application and initial curing prevents most appearance problems. Professional installations include environmental monitoring and control measures.
Dew point considerations become critical when temperature differences exceed 3-4°C between substrate and air temperatures. Condensation on the substrate creates ideal conditions for amine blush formation.
Problem 7: Fixing Patchy Finishes and Color Variations
Uneven color and patchy appearances frustrate property owners seeking uniform floor finishes. These problems typically result from moisture issues during the curing process.
Moisture Affects Curing Rates
Water on the epoxy surface during curing creates different rates of chemical reaction across the floor. Wet areas cure differently than dry sections, creating visible color and gloss variations.
Environmental factors including leaky air conditioning systems and overhead pipes can introduce moisture during critical curing periods. Pre-installation inspection identifies and corrects these issues.
Consistent Environmental Conditions
Maintaining uniform temperature and humidity throughout the installation area prevents most color variation problems. Professional contractors control these factors during application and initial curing.
Proper drying time before installation eliminates most moisture-related problems. Patient contractors who wait for ideal conditions produce superior results compared to rushed installations.
Professional Solutions for Rock Hill Residents
Top Flight Garage Floor understands the complexities of epoxy flooring installation and maintenance. Our team has encountered every possible problem and developed proven solutions for each challenge.
Property owners facing epoxy floor problems need experienced professionals who can diagnose issues accurately and implement effective repairs. Our comprehensive approach addresses both immediate problems and underlying causes.
Expert Installation Prevents Problems
Professional installation by Top Flight Garage Floor eliminates most common epoxy problems before they occur. Our systematic approach includes proper surface preparation, environmental control, and quality materials.
Years of experience in Rock Hill’s climate conditions help our team anticipate and prevent weather-related problems. We schedule installations during optimal conditions and use climate-appropriate products and techniques.
Maintenance and Repair Services
Even professionally installed floors may develop problems over time. Our maintenance and repair services restore damaged coatings and prevent minor issues from becoming major problems.
Regular maintenance extends epoxy floor life and maintains appearance quality. Our service programs help property owners protect their flooring investment through professional care and attention.
Material Selection Guidance
Choosing the right epoxy system for specific applications prevents many common problems. Our team helps property owners select appropriate materials based on use patterns, environmental conditions, and performance requirements.
Quality materials from reputable manufacturers provide better results and longer service life. We work exclusively with proven products that meet our strict performance standards.

Taking Action to Solve Epoxy Problems
Property owners experiencing epoxy flooring problems should act quickly to prevent further damage. Early intervention often allows for simple repairs rather than complete replacement.
Top Flight Garage Floor provides free consultations to assess problem floors and recommend appropriate solutions. Our diagnostic approach identifies root causes rather than just treating symptoms.
Professional assessment saves money by addressing problems correctly the first time. Our team’s experience helps property owners make informed decisions about repairs versus replacement.
Contact Information and Next Steps
Rock Hill residents can contact Top Flight Garage Floor for expert assistance with any epoxy flooring challenge. Our knowledgeable team provides honest assessments and practical solutions for every situation.
Whether dealing with peeling, poor curing, or appearance problems, professional help makes the difference between successful repairs and costly mistakes. Don’t let epoxy problems continue to deteriorate.
For expert consultation on garage floor coatings, professional epoxy floor installation, or creative garage floor designs, visit our main website or contact our team directly.
Top Flight Garage Floor brings professional expertise to every project, helping Rock Hill property owners achieve beautiful, durable floors that last for years. Trust our experience to solve your epoxy problems and prevent future issues through proper installation and maintenance.
